GeoPlan Print dialog
This dialog allows you to set some custom InfoWorks WS Pro print options, as well as the standard options you would expect from the Windows print setup dialog.
The dialog is displayed when you print from the GeoPlan window, for example by pressing Ctrl+P when the GeoPlan window is the active window.
Print tab
The Print tab allows you to change the scale of the printed output. The Scale box displays the current scale as taken from the GeoPlan. You may want to adjust this to the nearest standard used scale, such as 1:10000.
Page tab
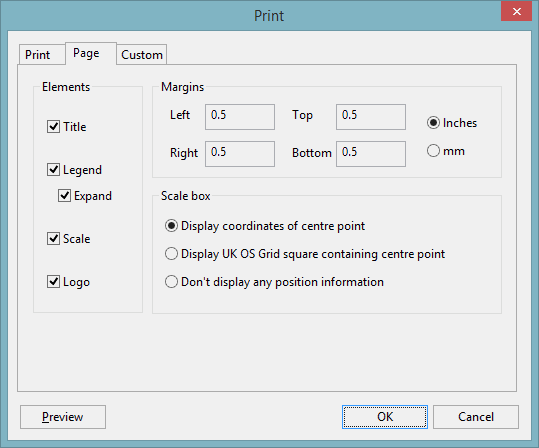
The Elements section of the Page tab allows you to choose whether additional information is displayed on the printed output:
- Title - from the master database. However, you can change it on the Custom tab.
- Legend - choose whether to display the symbol key normally visible in the Thematic Key window. Check the Expand box to display all of the symbols in the key. Uncheck the Expand box to display only those symbols that are currently displayed in the Thematic Key window.
- Scale - show the scale of the map.
- Logo - include a user-defined logo. You can change this on the Custom tab.
The Margins section lets you set the margins for the printed page.
The Scale box section lets you choose the additional position information to be displayed, if any:
- Display coordinates of centre point - include coordinate information
- Display UK OS Grid square containing centre point - include Grid square information
- Don't display any position information - only the scale will be displayed on the printed output
Custom tab
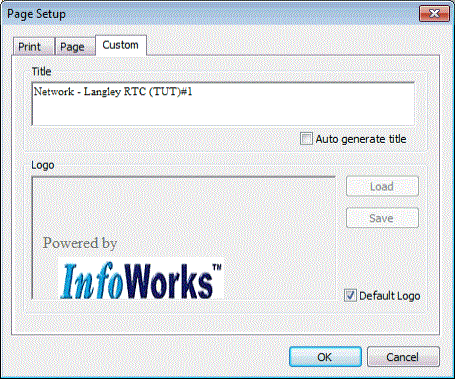
The Custom tab allows you to change the page title and set up a custom logo for inclusion on each page.
Custom logo
If the Default Logo box is checked, the default logo for the database will be used. The default logo is set in the Administrator. See Setting the default logo for details.
You can include a piece of Rich Text Format text to use as a custom logo on your GeoPlan printout. With the Default Logo box unchecked, you can either load an existing Rich Text (.rtf) file (created in an external package such as Microsoft Word), or paste text or images into the box and then Save them as a Rich Text file. This file is then included in the logo area of each printout.
You may have to manipulate the size of text and bitmaps outside InfoWorks WS Pro to display the logo to best effect.
Preview button
The Preview button is available when any tab is shown. It closes the Print dialog and replaces the network view with one that resembles the printed output. On the preview, you can click the Close button to return to the network view and reopen the Print dialog.


