InfoWorks WS Pro contains many methods for selecting network objects, a few of which have been described earlier. This part of the tutorial introduces more of the selection options.
This stage assumes that you have started InfoWorks WS Pro and that the Model Group window is open, showing the Newtown icon.
- A selection can be saved for future use:
- Select one or more objects using the selection method of your choice. For example, click the
 button, hold
down Ctrl and click each of the objects
in turn.
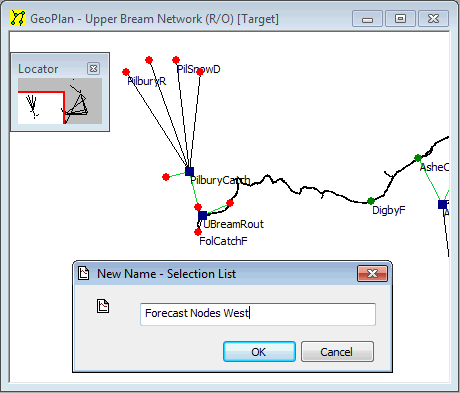
 - Right-click the Selection List Group in the Model Group window and select .
- Type an appropriate name for the selection (for example, 'Forecast Nodes West').
- Click .
- The selection list gets saved under the Selection List Group.
- Click a blank area of the GeoPlan to clear the selection.
- To select the same objects again, open the Selection List Group in the Model Group window (click the
 button to the left of the group) and drag the selection list onto the GeoPlan.
 - Create a new selection list by repeating the steps above (selecting different objects on the network, for example), and save the list.
- Combine two selection lists into a single list:
- Right-click the GeoPlan and select .
- Click
 to clear any current
selection.
 - Drag the icon of the first selection list onto the GeoPlan.
- Hold down Ctrl and drag the icon of the second selection list onto the GeoPlan, so that both lists are highlighted.
- Right-click the GeoPlan and choose .
- The combined list can be saved as a selection list.
There are a number of other options for handling selections in the Selection menu. Please refer to the links to the main Help file, at the bottom of this topic.


