step 2 - Building a bridge from section data

This stage assumes that you have started InfoWorks ICM and that the Explorer window is open, showing the Adding a bridge network icon. You should complete the previous stages before starting this stage. If you want to work with the prepared example data, load the appropriate version of the network. For instructions on how to load the database, see Opening the Example Database.
 Back to previous stage.
Bridges in InfoWorks ICM exist as a reach in their own right. The quickest way to achieve this is to insert two new break nodes, one either side of the bridge survey sections.
- Ensure that the Adding a bridge network and the DTM ground model are both open on the GeoPlan. Alternatively, if you have not completed the previous step, please use the provided Adding a bridge- step 1 completed network as a starting point.
- We are going to start by inserting two break nodes upstream and downstream of the bridge sections:
- First, zoom in the area of the bridge by using the Zoom in tool (
 ) of the GeoPlan Tools toolbar.
 - Set the New Object type to node and click on the New Object tool (
 ) of the toolbar and add a Break node at the US end of the bridge sections (South) and at the DS end (North).
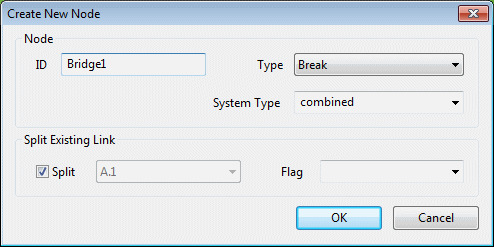
 - In the Create New Node dialog, use the following parameters and click on OK. Please ensure that the Split check box of the Split Existing Link section is ticked.
 Note
NoteMake sure that the cross hairs are placed exactly where the river reach and the river sections coincide. You may want to zoom onto the areas of interest in order to optimise node location. If the Split check box of the Create New Node dialog is disabled, it means that the node is not located at the intersection between the river reach and the river section.
Field
US node
DS node
ID
Bridge1 Bridge2 Type
Break
Break
Split existing link
yes
yes
- First, zoom in the area of the bridge by using the Zoom in tool (
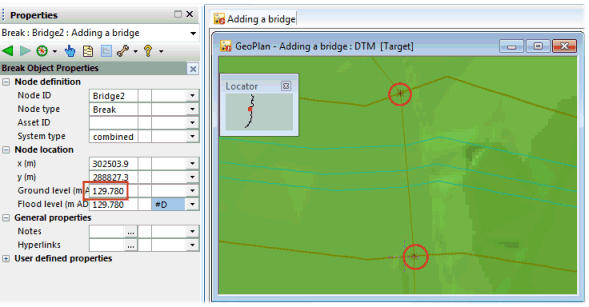
- If you wish set the Bridge1 node ground level to 130.72mAD in the node property sheet and the Bridge2 node ground level to 129.78mAD although break nodes do not necessarily need to have an assigned ground level.
- Delete the short section of river reach between the two new break nodes:
- Select the link between the two nodes Bridge1 and Bridge2 with the Selection tool (
 ) that can be found on the GeoPlan Tools toolbar.
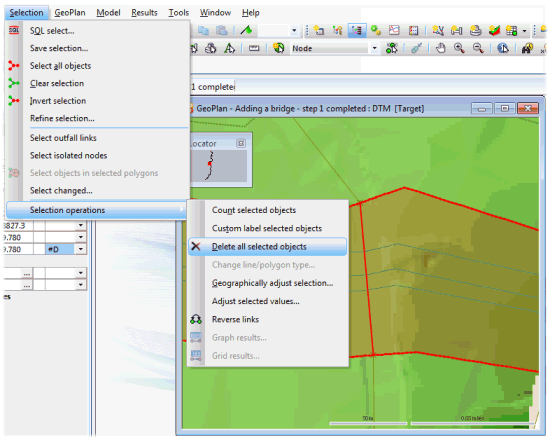
 - The short section delimited by the two break nodes is highlighted in red on the GeoPlan.
- Right-hand click on the highlighted section and select Selection | Selection operations | Delete all selected objects.
- The link is deleted from the network.
- Select the link between the two nodes Bridge1 and Bridge2 with the Selection tool (
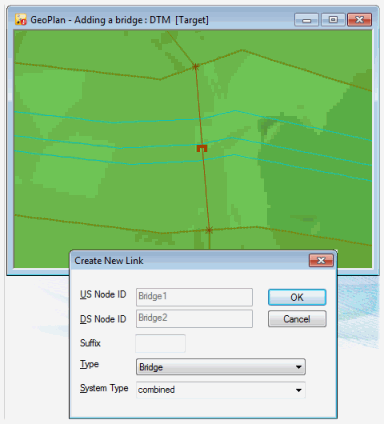
- Draw a new link upstream to downstream (South to North) between the two break nodes ensuring its type is set to Bridge:
- Set the New Object type to link and click on the New Object tool (
 ) of the GeoPlan Tools toolbar and digitise a link from Bridge1 to Bridge2.
 - Select Bridge: in the Type dropdown list and click on OK.
 Note title
It is important to draw the bridge upstream to downstream.
- Set the New Object type to link and click on the New Object tool (
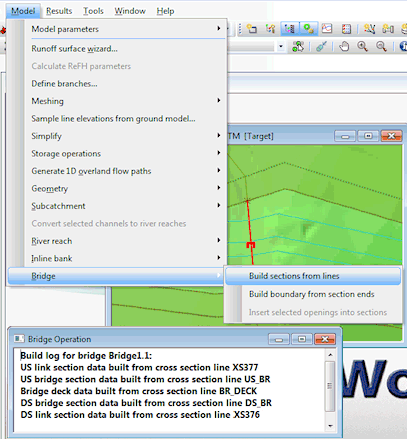
- To build the overall bridge structure from these section lines select the bridge link on the GeoPlan with the Selection button (
 ) and then select Model | Bridge | Build sections from lines. This will generate a report detailing the building of the bridge. Check the details and then close the report window.
 - Deselect the bridge by clicking on the Clear Selection button (
 ) of the Selection toolbar.
 - Commit the changes made to the network:
- In the Explorer window, right-hand click on the Adding a bridge network and select Commit changes (save to master).
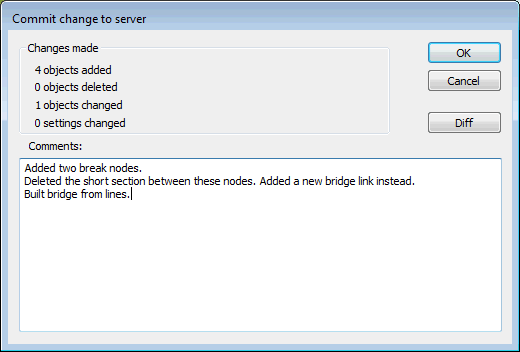
- The Commit change to server dialog is displayed.
- Type in any notes as appropriate.
- Click on OK to commit the changes and close the dialog.
- If a message is displayed asking you if you wish to validate the network at the same time as you are committing your changes, click on No for now. We are going to validate the network at the next stage.
 Back to Bridge Tutorial main page.
