Managing failed imported InfoAsset Manager reports
This functionality is available only to Administrators and System Administrators.
Failed reports are reports that have not successfully been uploaded to InfoAsset Manager.
Failed imports can be classified into two main categories:
- system errors resulting from a system failure, for example no dongle, InfoAsset Manager Exchange or InfoAsset Manager not available.
- non-system errors such as:
- validation failures occur when the information InfoAsset Mobile Server put into InfoAsset Manager came out differently in some way, for example data truncation.
- content error, encompassing errors like missing ID fields, data in the wrong format (text in a numeric field, etc). InfoAsset Mobile users can override the data input restrictions, causing truncations when the data is imported onto InfoAsset Manager.
Note: InfoAsset Mobile performs a failed report check at log-in.
To manage failed imported reports:
- In the Reports group of the Synchronize tab, select Manage Failed Reports.
The Manage Failed Imports dialog is displayed.
- Click the Refresh button to refresh the list of failed import reports (only to be performed if you know that reports are being processed at the same time that you are working in the Manage Failed Imports dialog).
Note: Any reports that are listed in Green have been corrected locally and so cannot be selected for further action until they have been uploaded.
- Select one report on the list to process reports one by one or select a form parent node to process all the child reports simultaneously.
Note: The only way to re-submit more than one report at a time is to select ONE form parent node. All its child reports will be processed simultaneously. Please note that only one single form parent node can be selected at a time.
- You can click on a failed import report on the list and read the content of the grey box on the right side of the dialog.
This provides more detailed information on the reason why the report has failed to import to InfoAsset Manager and may give you clues as to how to amend the report (for example, truncation).
- Process the selected report(s) as appropriate. See points a, b or c below for three different case scenarios:
- Click the Re-submit button to re-submit the unchanged failed imports for upload (to be used for system errors only).
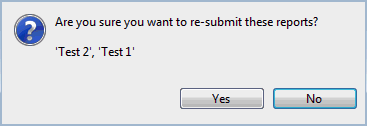
- The Re-Submit Report dialog is displayed.
 Show image
 - Click Yes to confirm, then OK on the subsequent message that gets displayed, indicating that the re-submitting has been successful.
- Click No to close the message and cancel the re-submitting.
- The Re-Submit Report dialog is displayed.
- Click the Ignore button to mark the selected reports as ignored.
- You are asked for confirmation. The Reason dialog is displayed.
- Type in a reason and click OK.
- The reports are removed from the list and they will not be displayed or reported at any point in the future until they are updated (that is, edited and uploaded).
- To investigate the reason for failure further click the Download button, this will download the report, if required, and mark it with the failure reason.
- Open it for editing in the Saved or Completed tab, depending on its status.
Note: When a failed report has been downloaded from the Managed Failed Imports dialog, it is allocated a
 icon (rather than
 or
or  ) in the List Saved or List Completed views, indicating that it has failed to import and needs looking at by a System Administrator.
 - Correct the error(s).
- Save the report (depending on the error, you may need to correct the related form).
- Upload the report.
- Open it for editing in the Saved or Completed tab, depending on its status.
- When finished, click the Close button. This closes the Manage Failed Imports dialog.
Note: Validation errors are not automatically cleared from this system. Once the related issues are corrected, the errors will need to be ignored for the fixed reports.

