Uploading reports
Both saved and completed reports can be uploaded to the server one at a time or all together via the Upload Report dialog.
It is also possible to automatically upload reports using Windows Task Scheduler or as part of an automatic synchronization operation. Refer to the Scheduled synchronizing of report uploads and downloads and the Automatic synchronizing of report uploads and downloads topics for more information.
To upload a report:
- Select Upload from the Reports group of the Synchronize tab.
The Upload Report dialog is displayed.
In the tree view in the Upload Report dialog, completed reports are automatically selected for upload.
- If required, select all reports of a certain type or one or more individual reports to upload, by ticking the corresponding check boxes.
- Check that the Remove after upload option is set as desired.
This controls what InfoAsset Mobile does to the local copies of the selected reports once these have been uploaded.
Tip: The default behaviour for this upload option can be set for the whole program in the Options dialog.
- Click the Upload button.
- Click Yes to upload the large attachments at the same time as the corresponding reports or No to upload the reports only.
Note: Large attachment upload can take a long time.
Alternatively click on Cancel to abort the upload.
A message may be displayed informing you that large attachments (such as videos, or attachments whose size is larger than the value in MB specified in the Application dialog) have been detected. ![]() Show image
Show image
EITHER the upload is successful and:
- The selected reports will be saved to the server, which will make them available for download by others.
- The data collated in the selected reports will be uploaded to InfoAsset Manager. See Viewing Data collated using InfoAsset Mobile in InfoAsset Manager for more information.
- A message is displayed letting the user know the upload has succeeded. Click OK to close this message.
OR there is a conflict and:
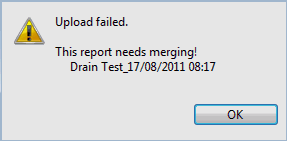
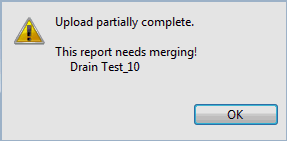
- An Upload failed or Upload partially complete message is displayed, letting the user know that one or more reports are in conflict and need merging.
 Show image
 - Click OK on the message to close it. Any reports for which there is no conflict have been uploaded.
- Merge the problematic reports. Refer to the Merging reports topic for more details.
Previously uploaded reports may be downloaded from the server by selecting Download from the Reports group of the Synchronize tab.


