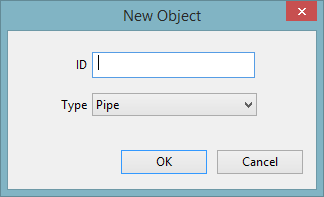
Create New Object Dialog
When digitising a new network object on the GeoPlan window, a 'Create New Object' dialog is displayed to let you specify information about the object.
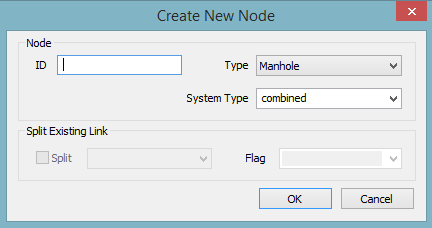
Displayed when digitising a new node on the GeoPlan or Long Section Window to create a new node.
Enter a unique identifier for the node. The node ID will be automatically populated if Automatic Node Name Generation is switched on.
Choose the type of node from the Type dropdown list. For InfoWorks networks choose System Type from the dropdown list. See System Type for more information.
If inserting a node into an existing link, make sure the Split box is checked, the link to be split is selected from the dropdown list and a flag is set if required.
For InfoWorks networks, the selected flag will be applied to the new link lengths and invert levels, however, it will not be applied to the new link lengths if the existing link length flag is set to #D.
For SWMM networks, the selected flag will be applied to the node name and upstream and downstream elevations for the new links. The flag setting also determines how the elevations are calculated in SWMM networks. See Digitising Network Objects for further information.
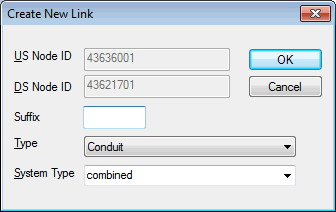
Displayed when digitising a new link on the GeoPlan Window.
The Upstream Node ID and Downstream Node ID are automatically filled in from the nodes that you clicked on.
You can enter a specific suffix if you want. If you leave this field blank, InfoWorks ICM will allocate a suffix for you. Select the link type from the Type dropdown list.
Select the System Type from the dropdown list. See System Type for more information.
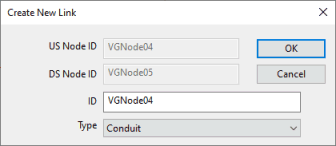
The US Node ID and Downstream Node ID are automatically filled in from the nodes that you clicked on.
The link ID is automatically populated using the selected naming method if Automatic Link Name Generation is switched on. If Automatic Link Name Generation is switched off, and you are adding a link to a node, the name of the upstream node ID will be used as the ID.
The ID can be changed if required.
Select the link type from the Type dropdown list.
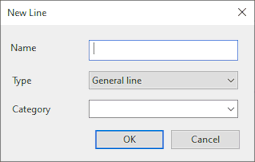
Displayed when digitising a new line on the GeoPlan Window.
Enter a unique identifier for the line.
Choose the type of line from the Type dropdown list.
The Category field becomes enabled when Type selected is General line.
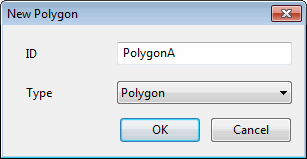
Displayed when digitising a new
Enter a unique identifier for the
Choose the type of
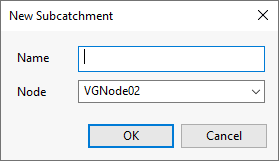
Displayed when digitising a new subcatchment for a SWMM network on the GeoPlan Window.
Enter a unique identifier for the area or subcatchment object in the Name field.
Select the node to which the object drains from the Node dropdown list. All nodes which are located within the subcatchment boundary are included in the list.
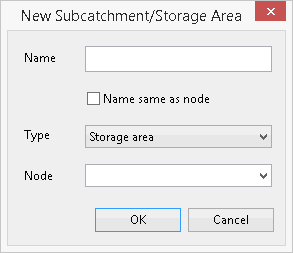
Displayed when digitising a new subcatchment or storage area for InfoWorks network on the GeoPlan Window.
Either enter a unique identifier for the area or subcatchment object in the Name field, or if you want the object to have the same name as the node to which it drains, simply click on the Name same as Node box.
Specify if the object is a subcatchment or a storage area by selecting the appropriate option from the Type dropdown list.
Select the node to which the object drains from the Node dropdown list.
Displayed when digitising a new rain gauge for an InfoWorks network on the GeoPlan Window.
InfoWorks ICM automatically provides a number as the profile title for the rain gauge, which can be changed by simply typing in a different title in the combo box. If the network already contains any rain gauges, then the number provided is the next sequential number.
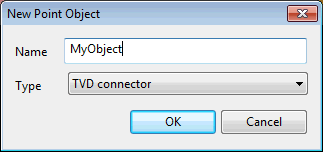
Displayed when digitising a new point on the GeoPlan to create a new point.
Enter a unique identifier for the point (the Name will be automatically populated if Automatic Node Name Generation is switched on).
Choose the type of point from the Type dropdown list.
Note: TVD connectors may be digitised as point or polygon objects but they will only appear in the Polygon grid.
Note that this functionality is only available to InfoAsset Manager networks.
Displayed when the New object context menu option is selected for a
Enter a unique identifier for the object and select a Type from the dropdown list (depending on the type of the object in the relationship group selected, there may be one or several available object types).
See Using the Object Browser Window for more information.
