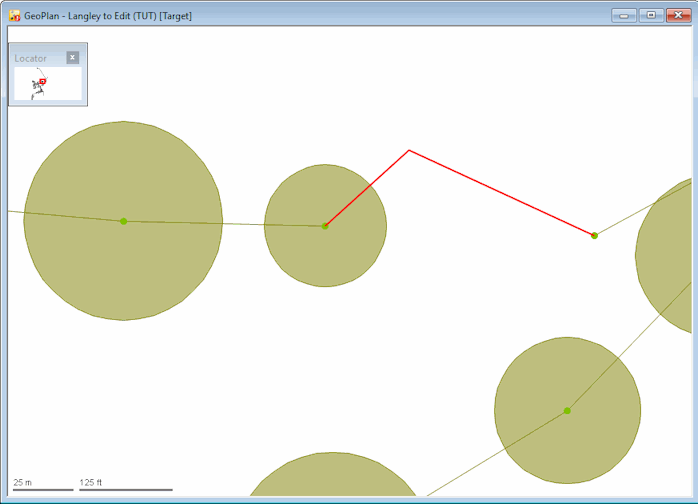
Imagine the situation where a number of corrections are made on an original network. For example, the changes could include; changes to node positions, changes to flow direction and bends in links, removal of a duplicate link, and the extension of a catchment area.
This section of tutorial illustrates copying the modifications from one network to another one.

This stage assumes that you have started InfoWorks ICM and that Master database, containing the ICM Basic Tutorial, is opened in the Explorer window, and shows the 'Langley Catchment Study' model group.
Two networks will be in the following procedure - 'Langley Data Copied (TUT)' and 'Langley to Edit (TUT)'.
To copy data between networks:
- Open the 'Langley Data Copied (TUT)' network. The ‘Langley Data Copied (TUT)’ network is now displayed in the GeoPlan window.
- Open the 'Langley to Edit (TUT)' network.
- Produce a report of the differences between the networks:
- Right-click the 'Langley to Edit (TUT)' network entry in the Explorer window.
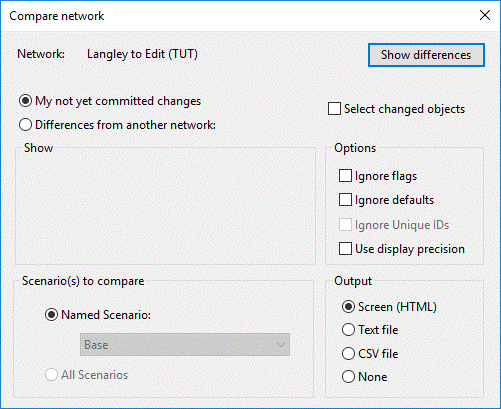
- Select the Compare... option from the pop-up menu. The Comparison dialog is displayed showing the name of the current network at the top of the window.
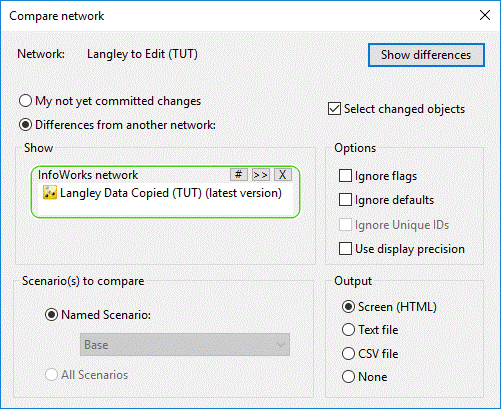
- Check the Differences from another network box to compare two different version controlled items. The Show pane is now enabled.
- Drag the 'Langley Data Copied (TUT)' network entry from the Explorer window into the Show box.
- Check the Select changed objects box.
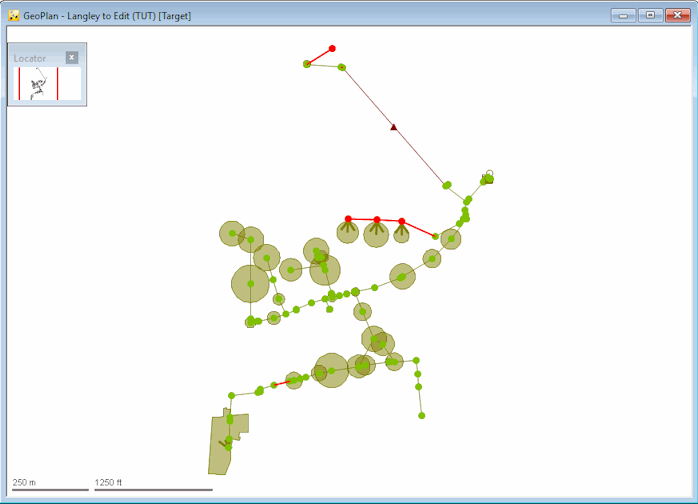
- Click the Show differences button. A Network differences text window is displayed listing the differences between the two networks and the changed objects are highlighted in the 'Langley to Edit (TUT)' network.
- Save the selected objects to a new 'All Edited Objects' selection list.
- Copy the node data to the new network:
- Click the title bar of the 'Langley to Edit' network (to indicate that this is the network that you are working on).
- Drag the 'All Edited Objects' selection list onto the 'Langley to Edit' network to select the edited nodes.
- Hold the CTRL key whilst clicking the
 (New nodes window) button on the Modelling Grid Windows toolbar to display the
Nodes grid for the 'Langley to Edit' network. Or, alternatively, select the Grid windows | New nodes window from the Window menu.
 - Drag the 'All Edited Objects' selection list again, but this time onto the 'Langley Data Copied' network to select these edited nodes.
- Display the Nodes grid for the 'Langley Data Copied' network whilst holding the CTRL key.
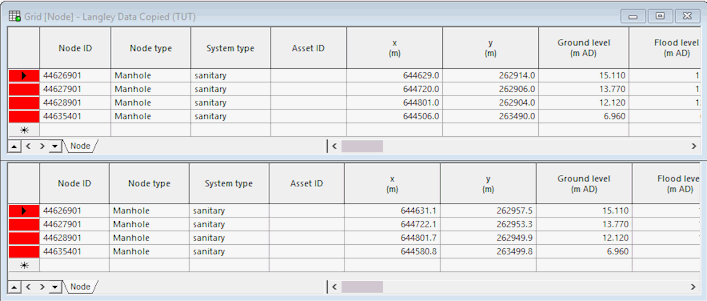
- Adjust the windows so that you can see both grids and use the Group network selections at top of grid option from the Grid menu so that the records for the selected nodes are at the top in both grids. Check that the Node IDs are in the same order.
- Change the column widths so that you can see the X and Y columns and freeze the Node ID columns. Some of the Y values and X values are different between networks for the selected nodes; the values that have changed (with the edited data flag) are shaded pale yellow (as set in the Editing Network Objects tutorial topic). See Working with Grids and Property Sheets for information about manipulating the grids.
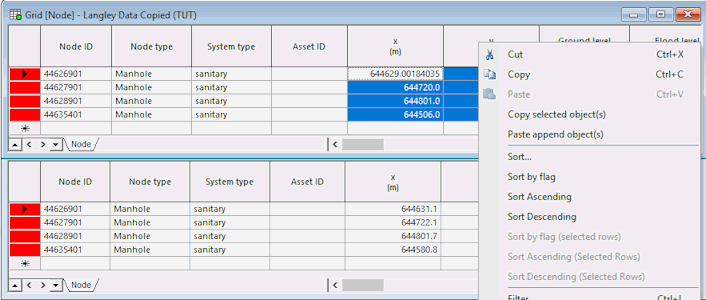
- On the 'Langley Data Copied (TUT)' node grid, select the X and Y column for the records with edited data flagged fields, right-click and select Copy from the pop-up menu.
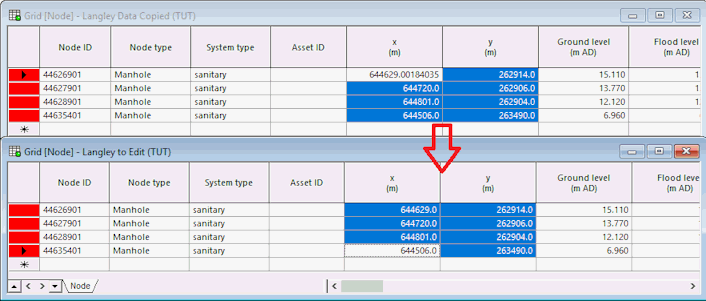
- On the 'Langley to Edit (TUT)' node grid, right-click the top X value and select Paste. The block of data is copied across.
- Close both grids.
- Make the changes to the links:
 Note
NoteThe Links grid does not contain all the details that have been changed. Therefore, using the method described in Step 5, for copying data is not appropriate in this case. Instead, the links themselves need to be copied. However, to avoid duplicate links, the originals must be deleted first.
- Clear the current selection on both networks.
- Zoom in on link '44628901.1' on the 'Langley to Edit (TUT)' network (the link to which bends need to be added).
- Use the
 (Select) tool to select only this link.
- Delete the selected link using the Selection operations | Delete all selected objects from the Selection menu.
- Delete link '44636401.2' (the link that was reversed).
- Use the GeoPlan tools to select the changed link on the 'Langley Data Copied (TUT)' network (links '44628901.1' and '44636401.2').
- Copy the selected links using the Copy object(s) option in the Edit menu.
- Click the 'Langley to Edit' network and select the Paste append object(s) option in the Edit menu. The corrected links are added to the network.
- Produce a new report listing the differences between the networks:
- Right-click the 'Langley Data Copied (Tut)' network entry in the Explorer window and select the Compare... option from the pop-up menu. The Comparison dialog is then displayed.
- Check the Differences from another network box to compare two different version controlled items. The Show pane is now enabled.
- Drag the 'Langley Network (TUT)' network entry from the Explorer window into the Show box.
- Click the Show differences button. A Network differences text window is displayed that lists the differences between the two networks.
- Close the text window.
- Close the 'Langley Data Copied (TUT)' GeoPlan window.
- Commit the changes to the 'Langley to Edit (TUT)' in the network but do not validate it.
- Close the 'Langley Data Copied (TUT)' GeoPlan window.
The original network now contains the corrections made in the edited network.

 button in the top right-hand corner of each window.
 button to clear any current
selection.
 (
(