Committing Your Changes
When you make changes to a version controlled database item, these changes are stored in your own local copy of the network (in your Local Working Folder directory). To make these changes available to other users they must be committed to the Master Database.
The software carries out the commit process in
- Local copy of the database item is updated with any changes made by other users. This is the equivalent of doing an update (see Getting Other Users Changes).
- If any conflicts arise between your changes and those made by others, these must be resolved.
- When conflicts have been resolved, your changes can be saved to the Master Database.
To commit changes use one of the following methods:
- Right click on the database item in the Explorer Window and choose Commit changes (save to master) from the popup menu.
-
Click
 on the File Toolbar to commit changes to the currently active item.
 - If the currently active window is a Network or GeoExplorer, select Version control | Commit changes (save to master) from the Network menu.
- If the currently active window is a Digitisation Template, select Revert changes from the Digitisation Template menu.
Additionally users may be prompted to commit their changes when closing a locally modified version control object or closing InfoWorks ICM in presence of one or more locally modified version controlled objects. Note that the commit prompt only gets displayed if the Prompt for commit before closing version controlled items option is enabled in the Options dialog.
The Commit Changes dialog is displayed. In this dialog you can:
- See a summary of the changes, additions and deletions made.
- Add a comment that will be available to other users when they look at the history of the version controlled item.
- Compare your current version of the database item with the latest version in the database, or with a completely separate item of the same type. Simply click the Diff button.
Click OK to commit your changes.
- You have made changes that conflict with changes made by another user. These conflicts must be resolved before changes can be committed. If there are conflicts, the Resolve Update Conflicts dialog is displayed. See Resolving Conflicts for more information.
- The database item has been reserved by another user. If another user has reserved the database item, an error message will be displayed containing details of the user that has the item reserved. The item must be unreserved before changes can be committed. See Reserving a Version Controlled Item for more information.
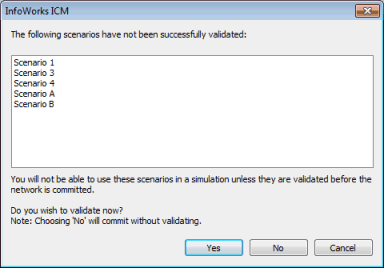
- The item is a network that has not been validated, or contains scenarios that have not been validated. A dialog will be displayed offering the choice to commit with or without validating, or to cancel the commit process. A scenario that is committed without validation cannot be used in a simulation. Choosing Yes to validate will display the Network Validation dialog. If validation is successful (i.e. no validation errors) changes will be committed and the validated scenarios will be available for use in a simulation. If validation of one or more scenarios is not successful, the dialog listing the scenarios that failed validation will be redisplayed.

