Commit History Dialog
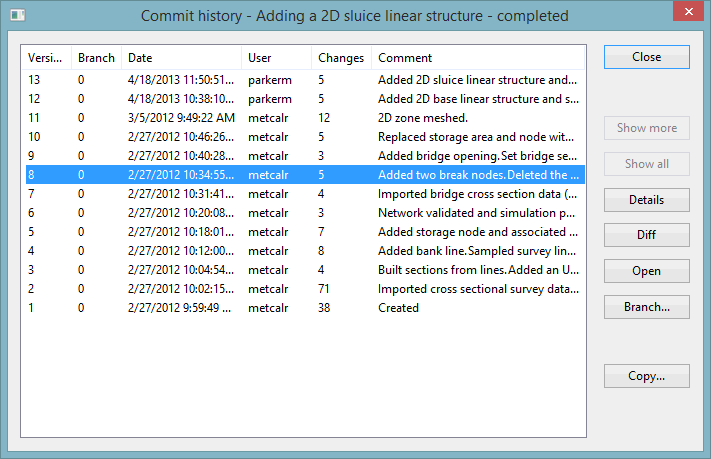
This dialog shows the history of changes to a version controlled item, or a single network object, that have been committed to the master database.
The dialog is displayed when you:
- Right-click the version controlled item in the Explorer Window and choose Show commit history from the popup menu
- Select Version control | Show commit history from the Network menu when a Network or GeoExplorer window is the currently active window
- Select Show commit history from the Digitisation Template menu when a Digitisation Template is the currently active window
- Click Commit history in the Resolve Update Conflicts dialog when resolving conflicts
For a single network object, the dialog is displayed when you click the Commit history ( )toolbar button in the object's object property window.
In the dialog you can:
- View details of any previous commit, such as user id, number of changed objects and any comments made at the time. To do this, select one of the rows in the list and click Details. This displays the Commit Details dialog and the Object Commit Details dialog for version controlled items and non-version controlled items respectively. In both dialogs, you can find details about what changes were made to the selected item in the master database during a single commit operation. Additionally, the Full history option of the Object commit details allows users to access the full commit history for the network object.
- View the differences between two versions. Select two rows to view the differences between those two versions. Select one row to view the differences between that version and your current version, including any uncommitted changes. Then click Diff. This displays the Object version comparison grid where the values are displayed side by side for both versions.
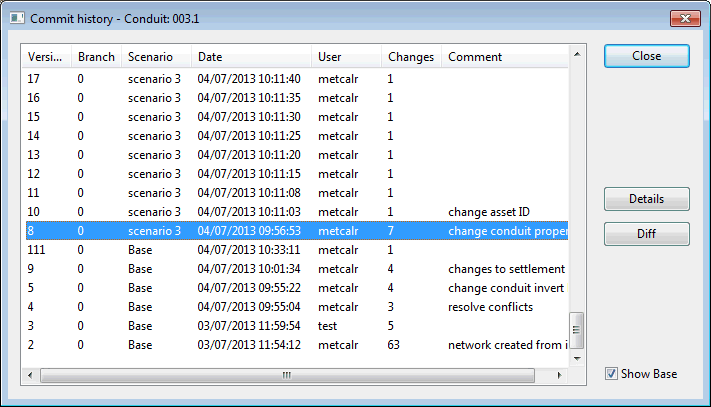
- View all the commits (scenario and base commits) for the selected network object if is in a scenario and has been modified from the base. To do this, enable the Show Base option. This option is disabled by default (only scenario commits are displayed by default).
- Open a previous version of a version-controlled item. For this, select a row (version) and click Open. InfoWorks ICM will retrieve the data from the master database and display a read only copy.
- Create a branch for a specific version of the version-controlled item. Select a row (version) and click Branch. A new version of the network is created, based on the version of the selected network.
- Copy a selected network to a new network. The new network will contain everything in the selected version, including scenarios, but without the commit history. Select a row (version) and click Copy. This displays the Create new network dialog. Select the location where the copied network is to be saved. The name of the new network can be changed, if required, by editing its name in the top of the window. Click Save to save the selected network, and the new network will be listed in the Explorer Window.
- Copy history to the clipboard. Select one or more rows, right click and choose Copy selected items to the clipboard from the context menu.

All base commits are displayed after scenario commits. The order in which commits are listed in the dialog is based on the order of precedence for scenario objects rather than chronological order. Scenario commits always override base object commits.
Click Close when you have finished using the dialog.
Another version of this dialog (the Select Commit dialog) is displayed in cases where there is an option to select a previous version of a network or other version controlled item. Select the version to be used and click OK. Click Use latest
For further information, see Viewing the Commit History.


