Pruning the Network
The existing model is a complete representation of the physical network. For some purposes it is useful to have a simplified version, where any minor nodes and links are removed, if that will not significantly affect the results produced by the simulation. InfoWorks ICM allows you to simplify the network in two ways: pruning and merging. This topic looks at pruning.

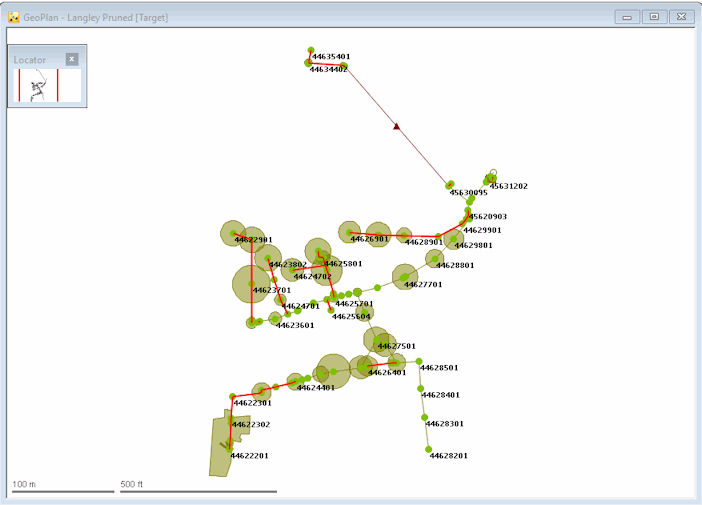
This stage assumes that you have started InfoWorks ICM and that Master database, containing the ICM Basic Tutorial, is opened in the Explorer window, showing the ' Langley Catchment Study' model group.
To prune the network:
- Open the 'Langley Pruned'
network.

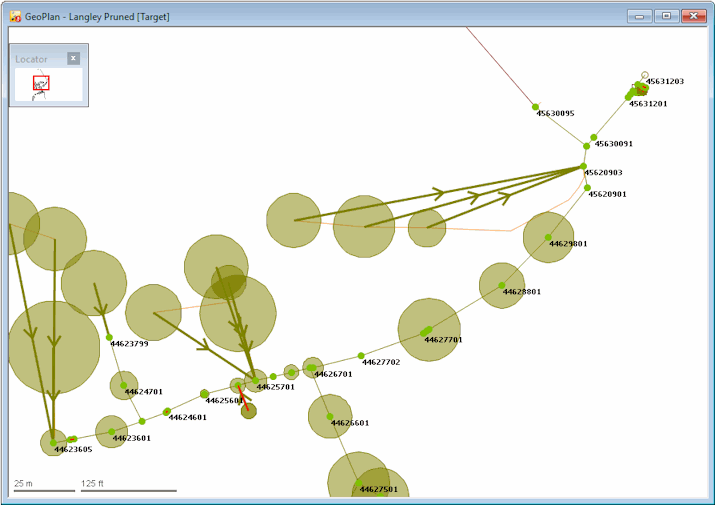
- Drag the 'Pipes < 250 mm' selection list (which was created in the Creating Selection Lists with SQL topic and is located in the 'Selection List Group' in the Explorer window) onto the network. This are the links that may be pruned (removing them would not significantly affect the network).
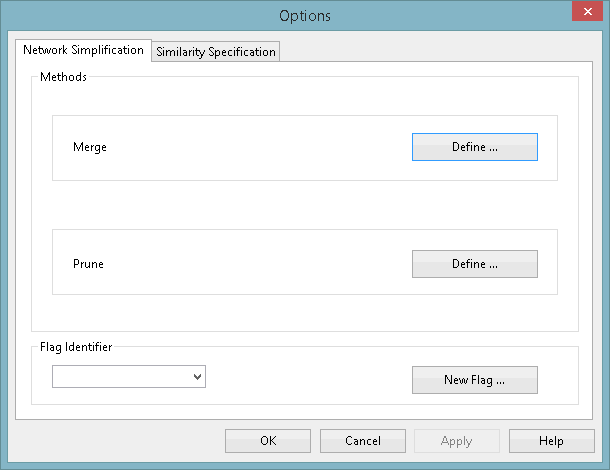
- Set up the pruning options:
- From the Model menu, choose the Simplify | Simplification options option. The Simplification Options dialog is displayed.
- Click the Network Simplification tab.
- In the Prune pane, click the Define... button. The Prune dialog is displayed.
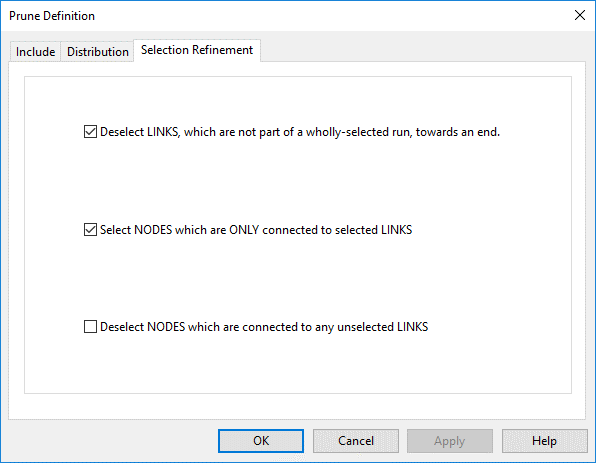
- Click the Selection Refinement tab.
- Make the following refinements:
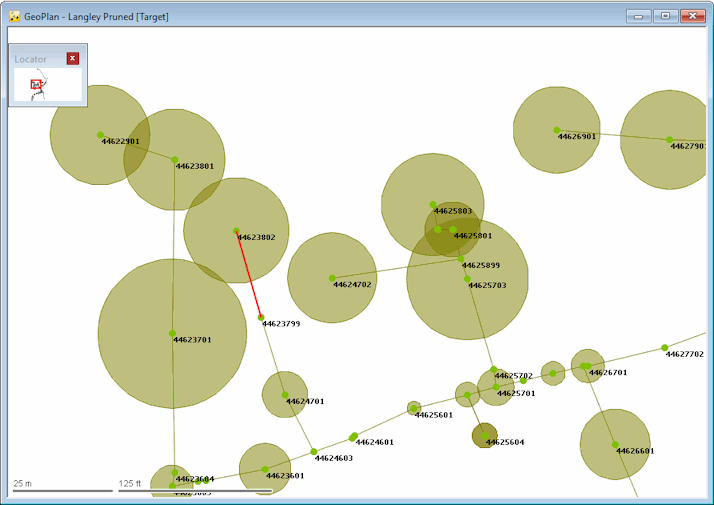
- Check the Deselect LINKS, which are not part of a wholly-selected run, towards an end. box. This will remove from the selection any links whose deletion would leave other links "stranded" (for example, link '44624602.1', which has a width of 225 mm but is downstream of a run of wider pipes).
- Check the Select NODES which are ONLY connected to selected LINKS box. This will include any nodes that are connected only to selected links and would therefore end up not connected to the network (for example, node '44623802' is connected to only a single selected link but node '44623799' will still be connected to a link after pruning).
- Do not check the Deselect NODES which are connected to any unselected LINKS box. This option removes from the selection any nodes connected to unselected links. This function is not required in this case as no nodes were included in the 'Pipes < 250 mm' selection list opened in Step 2.
- Click the OK button on both windows.
- From the Model menu, choose the Simplify | Refine selection for pruning option. The objects that meet the "selection refinement for pruning" (defined in Step 3) are highlighted on the GeoPlan.
- Right-click on the GeoPlan and choose Selection from the drop-down list.
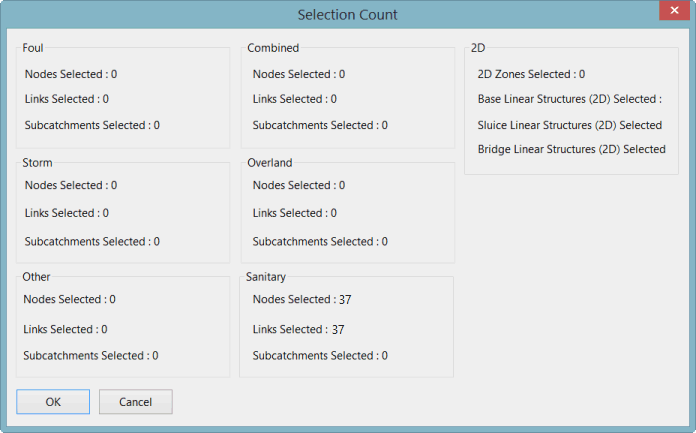
- Select the Selection operations | Count selected objects option from the Selection menu to check the effect of the pruning. A Selection Count dialog is displayed informing you of the number of objects that will be affected by pruning.
If you are using the tutorial network, then the message should show that 6 of the original 41 links have been deselected (leaving 35) and 35 nodes have been added to the selection. If you are using another network, then the count will depend on the network you are using.
- Click OK to close the window.
- Select the Simplify | Prune selection option from the Model menu. A message is displayed informing you of the number 'areas' to be pruned.
The count depends on which network you are using. If you are using the tutorial network, then 11 areas are to be pruned.
- Click OK to prune the network..
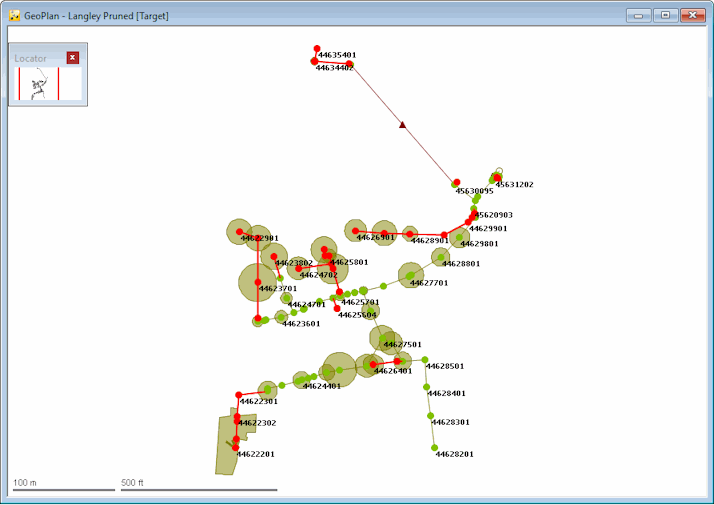
The remaining areas are pruned, with the removed links shown as orange lines.


- Drag the 'Pipes < 250 mm' selection list onto the GeoPlan.
- Right-click the GeoPlan and select the Zoom to selection option from the pop-up menu to zoom in on the unpruned links.
- Check the selected links:
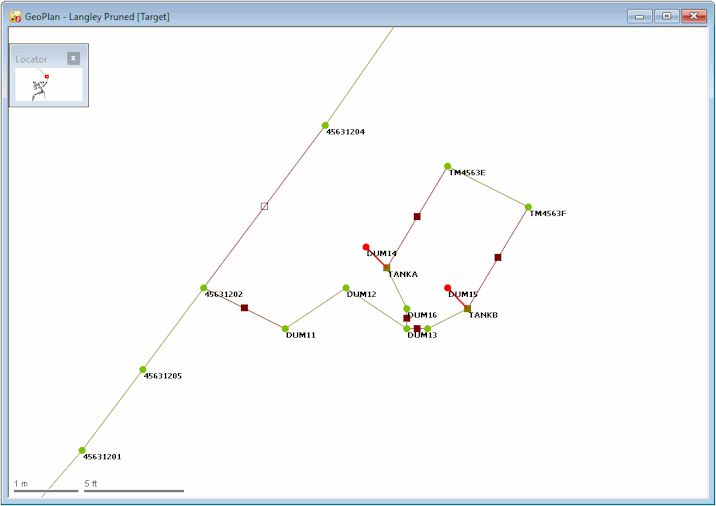
- Two links near the storage tanks could not be pruned.
- The link below the pump has not been pruned because the pump has not been selected. The pump (which now pumps from nowhere) should also be pruned.
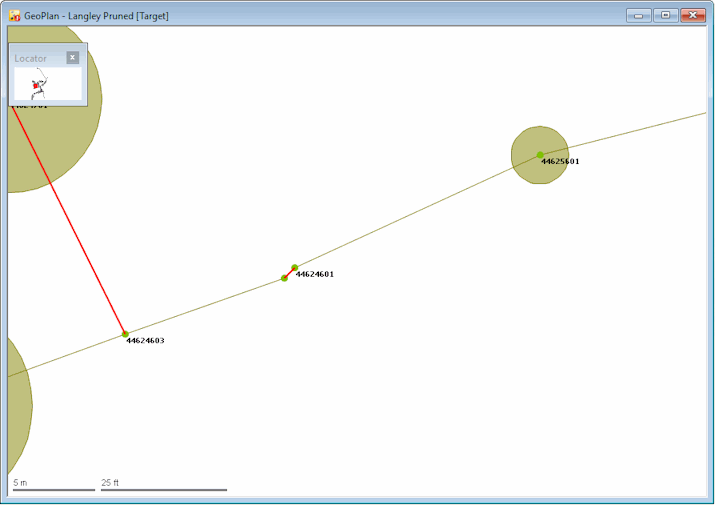
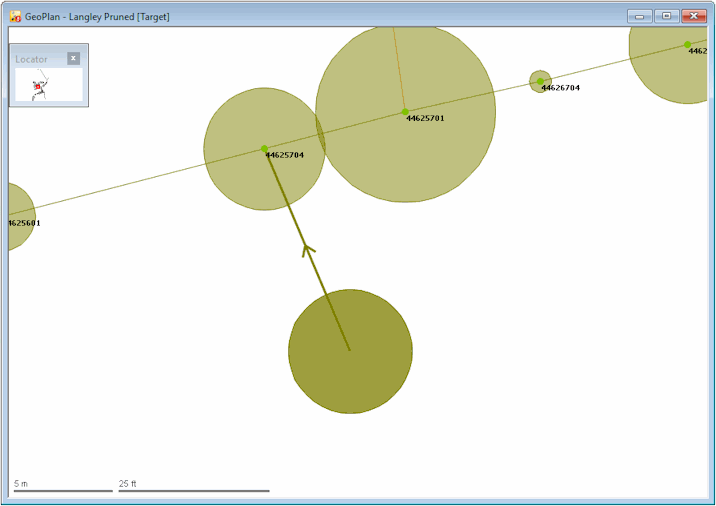
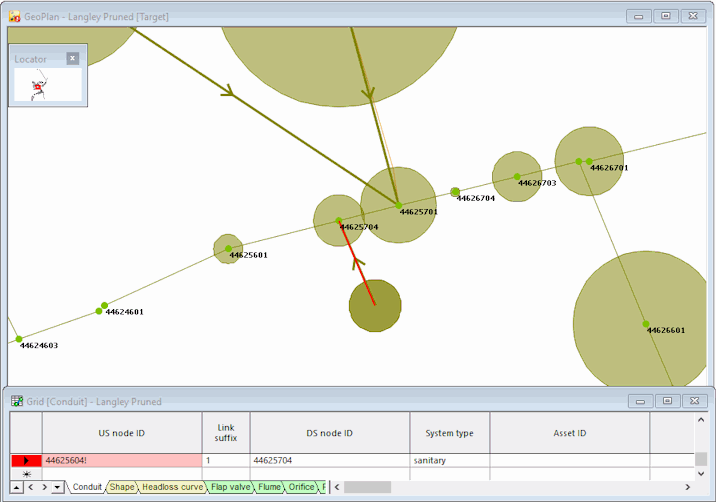
- The remaining pipes look as if they should have been pruned. Move the pointer over them and double-click the supposedly pruned link that goes northward to '44625704'. There is another link that is duplicated and was not pruned.
- Use the
 (Polygon select) tool to select the double links.
 - Display the Links grid.
- Move the entries for the selected links to the top of the grid so that they can be compared. You can see that the upstream node has been deleted, but the duplicate link 446256041.1 has not.
- Click to the left of the '44625604!' record (which has a Link suffix of '1') so that it is the only one selected and press the DELETE key to delete it.
- Close the grid by clicking the
 button in the top right-hand corner of the window.
- Drag the 'Pipes < 250 mm' selection list onto the GeoPlan.
- Right-click the GeoPlan and select the Zoom to selection option from the pop-up menu to zoom in on the unpruned links.
- Select the
 (Selection) tool and CTRL-click the pump to add it to the selection.
 - Check that the correct number of objects are selected.
There should now be six links selected; the original five (after the duplicate link was deleted) plus the pump.
- Select the Simplify | Refine selection for pruning option from the Model menu. The refinement of the pruning process will have reduced the selection to three links and three nodes, having excluded the duplicated links earlier.
- Select the Simplify | Prune selection option from the Model menu.
- Confirm the deletion of three areas by clicking OK in the message window. The two superfluous 'arms' are removed.
- Check that there are only four links left in the 'Pipes < 250 mm' list.
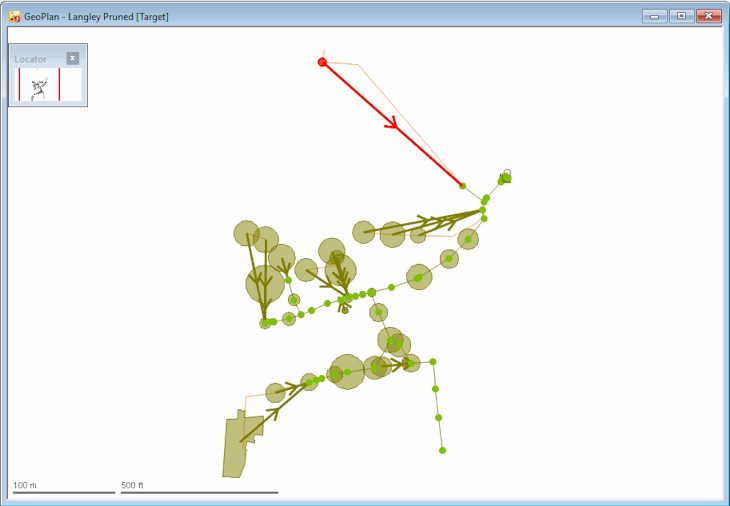
- Delete the subcatchment that drained to the node at the top of the pump:
- Select the (Selection) tool and select the subcatchment to be deleted.
- Right-click the GeoPlan and select the Subcatchment | Delete option from the pop-up menu. A message is displayed informing you of the deletion.
- Select the
Note that you need to validate the network.
The network can now be further simplified by merging runs of similar pipes.
 Back to flowchart
