Using Dockable Windows
InfoWorks ICM has several windows containing important or additional
information that can be docked to any side of the InfoWorks ICM
Dockable windows are modeless (you can work in any other part of the InfoWorks ICM interface when you open a dockable window).
The dockable windows in InfoWorks ICM are:
- Explorer Window
- Thematic Key Window
- Flag Window
- Spatial Bookmarks Window
- Object Properties Window
- Job Control Window
- Job Progress Window
- Object Browser Window
- Validation Output Window
- Message Log Window
The window visibility state can be toggled (either visible or hidden) from the
To hide a dockable window, click on the X button at the top right-hand corner of its title bar or toggle it from the Window menu.

Explorer windows are slightly different – multiple Explorer windows can be opened from the Window menu and they can only be closed using the X button.
To close the Dockable Window window, click on the
Close ( ) button in the top right or top left corner
(depending on the position of the window).
As mentioned above, a dockable window can be docked or floating:

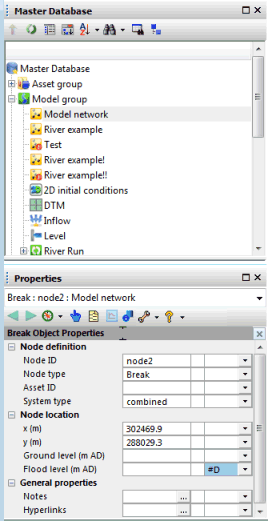
Example of dockable Window - docked position

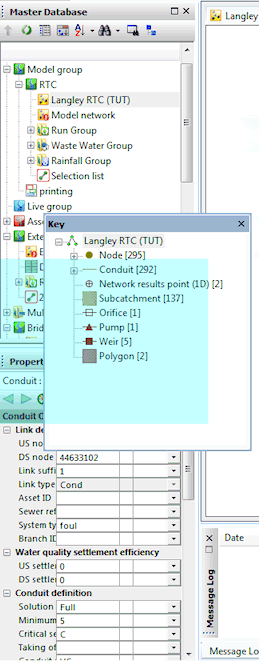
Example of dockable Window - floating position
You can reposition a docking window by dragging its title bar to the desired location. If the window is already docked, starting to drag will cause it to float. If you then drag it close to the side of the application window, or over another docked window, a blue highlight will show the location at which the window would be docked.

Blue highlight showing the location where the
will be docked when the mouse is released.
If this is the desired location, simply release the mouse button and the window will dock. If not, continue dragging until the highlight changes to the desired location.
 Tip
Tip If you want the window to remain floating in the position you have dragged it to, hold the CTRL key down while you release the mouse button.
To float a window that is docked, simply drag its title bar away from the edges of the InfoWorks ICM window.
In general, a dockable window will reappear at the size and position at which it was last visible, but this may change if other dockable windows have been made visible or repositioned in the meantime. When InfoWorks ICM starts, the dockable windows will be in the same location as when the application was previously closed, unless the Reset toolbars and windows item from the
The default layout for a new installation (or if you have selected Reset toolbars and windows) is to have all vertically-oriented windows tabbed on the left (Object Properties Window, Thematic Key Window, Job Progress Window and the first Explorer window) and all horizontally-oriented windows tabbed at the bottom (Output and Simulation Control Windows). Additional Explorer windows are initially floating.
You can change the size and position of Dockable Windows:
- To change the size of a floating window, drag any corner or edge of the window.
- When docked the window will have a single free edge. You will only be able to resize in one direction by dragging the free edge.
- If you have docked two dockable windows along the same side of the InfoWorks ICM Main Window, you can use the small arrow to maximise the size of one of the windows, at the same time minimising the other.
You can reset the size and position of the various dockable windows
(including toolbars) round the InfoWorks ICM
To reset dockable windows back to the default locations:
- choose Reset toolbars and windows from the Tools menu
- quit the application and restart (you do not have to do this immediately).
When there is more than one window docked to the same side, those windows can be laid out in one of two ways: Stacked or Tabbed.

Stacked Layout

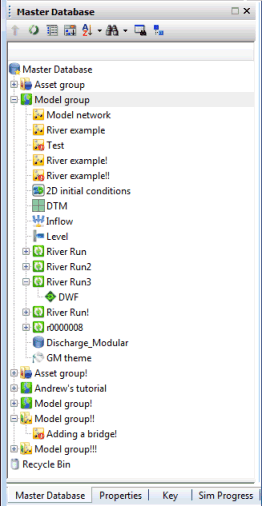
Tabbed Layout
Stacked and tabbed layouts cannot be mixed on the same side, but it is possible to have some sides tabbed and other sides stacked. The switch from a stacked to a tabbed layout is made by dragging a floating window close to the bottom of the side, as described below. To go back to a stacked layout, it is necessary to float all but one of the tabbed windows, then re-dock them in the desired layout.
Because hidden windows attempt to reappear at their previous position, if you hide a tabbed window, then set up a stacked layout on that side, the layout will switch back to tabbed when the hidden window is made visible again.
The windows are arranged in one or more rows or columns along the side, each window being visible and occupying part or all of a row/column. The windows can be resized within each row/column and the height/width of each row/column can be adjusted. Each window also has a maximise/restore button next to the X button. Clicking on this causes the window to occupy as much as possible of its row or column – the other windows shrink to show only their title bars. Clicking again restores the original size. When you drag a floating window over a stacked layout, the blue highlight will show where the new window would fit into the existing layout – either within an existing row or as a new row. If you drag the floating window close to the bottom of the side, the blue highlight will appear as a narrow strip representing a row of tabs; if you then release the mouse button, all the existing windows docked to that side, plus the new window, will be forced into a tabbed layout:

How to obtain a tabbed layout
Only one window is visible at a time, occupying the whole of the side. A row of tabs at the bottom of the side allows the user to switch between the different windows that are docked to that side. The order of the tabs can be adjusted by dragging an individual tab along the row of tabs. When a floating window is dragged into an existing tabbed layout at a point above the row of tabs, the blue highlight covers the whole row of tabs and the new tab will appear at the end of the row – by dragging into the row of tabs, the tab can be placed more precisely, indicated by a tab-sized highlight within the row. Tabbed windows can also be floated by dragging the relevant tab away from the row of tabs.
