It is possible to add Nodes and Links to an existing network and this topic details how to do this in theory and shows an example on our example network.
InfoWorks ICM includes facilities for rapidly adding nodes and links to the GeoPlan without having to name each object or view the object property sheet. This means that you can carry out a process similar to digitising on the GeoPlan View. With the help of GIS data, you can add nodes and links very rapidly.
Each node can be automatically given an ID, normally based on its location. You can also add connected runs of nodes and links together, including adding bends in links, allowing you to build up your network structure in the minimum amount of time.
Once you have set up your digitising options, you can use the normal node and link creation tools to add new objects to your network.
Adding a Node
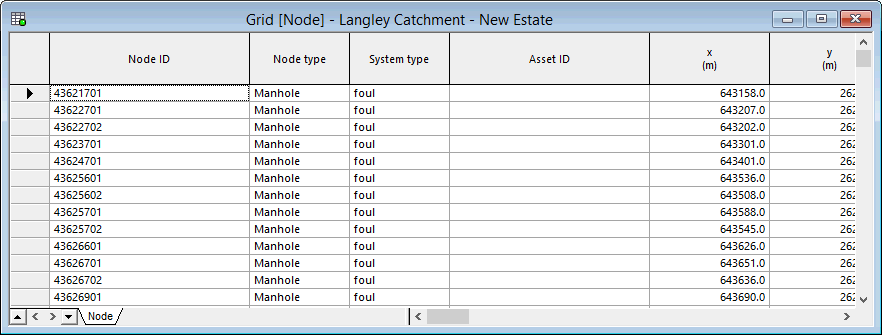
Nodes can be added on the GeoPlan View, the Long Section View, or the Grid View.
- Ensure that a network is open on the GeoPlan.

- Select the
 option from the drop-down list on the GeoPlan Tools Toolbar.
 - Click the
 (New object) button on the toolbar. The cursor changes to
  on the GeoPlan.
- On the GeoPlan, click the position where you want the new node.
- The Create New Node dialog is displayed.
- On the Create New Node dialog, enter a unique name/identifier for this node in the ID field. (The node ID will be automatically populated if Automatic Node Name Generation is switched on.)
- Choose the appropriate type of node and drainage system from the Type and System Type from the drop-down lists. See Nodes and System Type for more information.
- If inserting a node into an existing link, check the Split box, select the link to be split and set a flag for new link lengths if required. See Data Flags for more information.
- Click OK. The new node is created and displayed on the GeoPlan. The property sheet for the node is also displayed in the left part of the main window. You can enter additional properties on the Node property sheet now or later.

- Ensure that a network is open on the GeoPlan.
- Display a long section view. Either select the GeoPlan Tools|Long Section pick option from the GeoPlan menu or click the
 (Long section pick) icon on the toolbar. Click where you want to insert the new node on the network and a Long section view is displayed.
 - Select the option from the drop-down list on the GeoPlan Tools Toolbar.
- Click the (New object) button on the toolbar.
- The cursor changes to a on the GeoPlan.
- On the Long Section View, click the link into which you want to insert the new node. The Create New Node dialog is displayed.
- On the Create New Node dialog, enter a unique name/identifier for this node in the ID field. (The node ID will be automatically populated if Automatic Node Name Generation is switched on.)
- Choose the appropriate type of node and drainage system from the Type and System Type from the drop-down lists. See Nodes and System Type for more information.
- If inserting a node into an existing link, check the Split box, select the link to be split and set a flag for new link lengths if required. See Data Flags for more information.
- Click OK. The new node is created and displayed on the GeoPlan. The property sheet for the node is also displayed in the left part of the main window. You can enter additional properties on the Node property sheet now or later. If you change any node properties, click OK to save them.
- Click the
 (New nodes window) button on the Modelling Grid Windows toolbar.
Alternatively, select the Grid windows | New nodes window from the Window menu.
(New nodes window) button on the Modelling Grid Windows toolbar.
Alternatively, select the Grid windows | New nodes window from the Window menu. - Scroll the grid down until you reach the append row. The append row is marked with a * in the left column.
- Type a unique name/identifier for the new node in the Node ID column of the append row. As soon as you start to type the icon changes to .
If you want, you can now add other parameters in the append row.
- To save the new node, move off the row you are editing by clicking another row in the grid. If the node name/identifier is not unique, a message will be displayed, and you can now change the Node ID.
To abort the process, click the
 button on the toolbar.
The Node Grid is now displayed.
Adding a link
Links can be added on the GeoPlan View or the Grid View.
- Ensure that a network is open on the GeoPlan.
- Select the
 option from the drop-down list on the GeoPlan Tools Toolbar.
 - Click the button on the toolbar. The cursor changes to
 on the GeoPlan.
- Ensure that Snapping Mode is activated if you want to enable InfoWorks ICM to snap onto nodes near the cursor.
- Click the node at the upstream end of the new link. The cursor is now attached to the upstream node by a red line. If there is more than one node beneath the cursor, a dialog is displayed allowing you to select the relevant upstream node. If you are unsure, zoom closer on the GeoPlan, and start again.
- If the links is to contain any bends, then click one or more intermediate points.
- Click the downstream node to complete the link, and the Create New Link dialog is displayed.
- Select the link type and enter a suffix if necessary. If you do not enter a suffix, InfoWorks ICM will create one for you.
- Select the System Type from the drop-down list.
- Click OK.

The new link is created and displayed on the GeoPlan. The property sheet for the new link is displayed. You can enter additional properties now or later. If you change any link properties, click OK to save them. You can click Cancel to exit the property sheet without making any changes. The new link will not be removed.
- Click the
 (New links window) button on the Modelling Grid Windows toolbar, and select the New links window option from the drop-down list .
Alternatively, select the Grid windows | New links window from the Window menu.
(New links window) button on the Modelling Grid Windows toolbar, and select the New links window option from the drop-down list .
Alternatively, select the Grid windows | New links window from the Window menu. - Click the appropriate tab.
- Scroll the grid down until you reach the append row. The append row is marked with a * in the left column.
- Select the names/identifiers for the upstream and downstream nodes from the drop-down list in the appropriate columns in the append row, or you can type in names/identifiers for nodes you have not yet created. You may also need to add a unique suffix for the new link. As soon as you start to type the icon changes to . You can add other parameters to the append row now if you want.
- To save the new link, move off the row you are editing by clicking another row in the grid. If the combination of upstream node, downstream node, and suffix are not unique, a message will be displayed. You must type in a unique set to identify the link.
To abort the process, click the
(Undo) button on the toolbar.
The New Grid is now displayed.
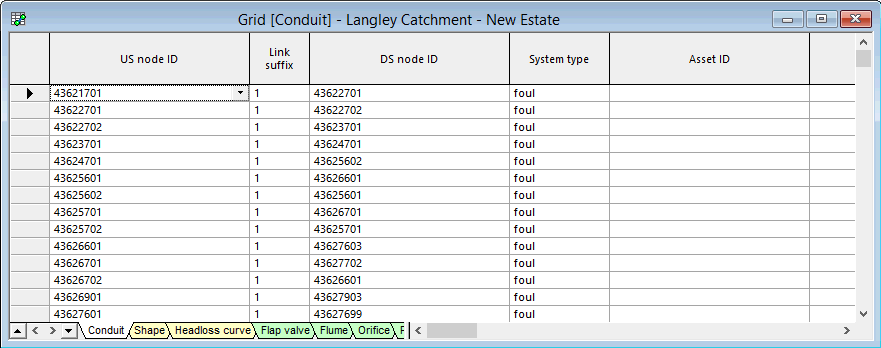
The properties for each type of link are contained in a separate tab at the bottom of the grid.
If you connect either end of the link to a node that does not yet exist, or has no positional data, the link will be connected to the origin of the coordinate system at one end. If both ends have no positional data, the link will appear as a dot at the origin. To give the link a valid position you must change the position of its connected nodes.
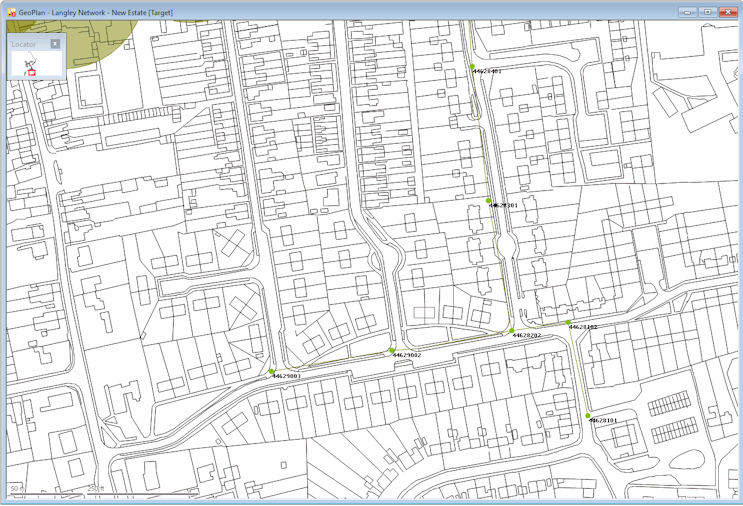
Example of Adding Nodes and Links

This stage assumes that you have started InfoWorks ICM and that the Explorer window is open, showing the network icon for the Langley Catchment Study Model Group.
Before making a start on this tutorial, it is important to ensure that the units of measurements shown in InfoWorks ICM displays are set to metric. For this, select Options... from the Tools menu and click the Units tab. Ensure that default units are set to Metric (Native).
To add nodes and links to the example network:
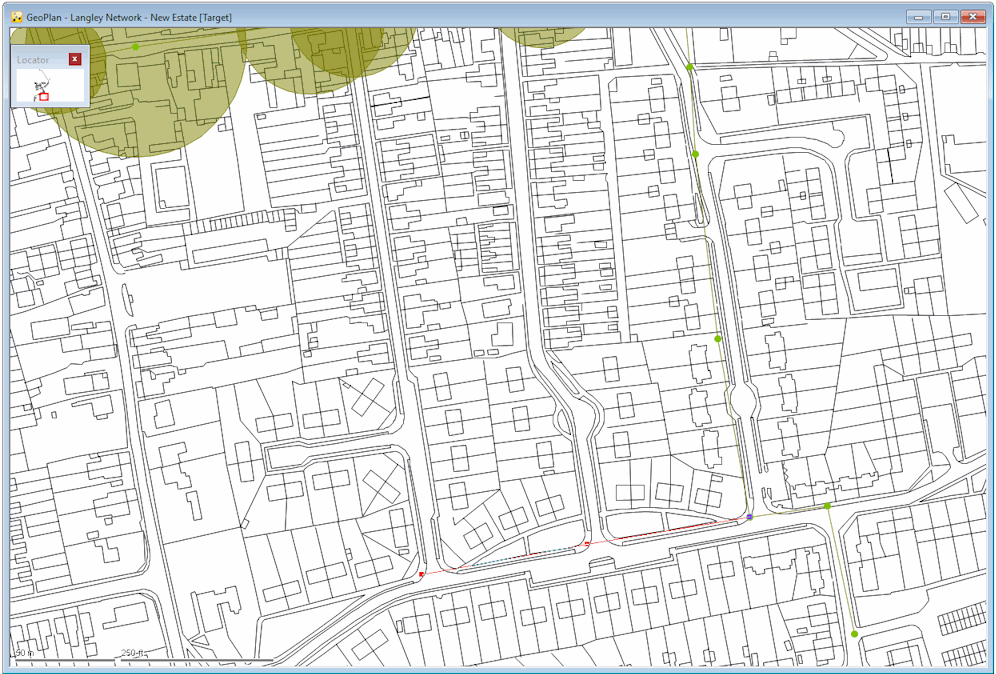
- Open the 'Langley Network - New Estate' network.
- Display the background map if it is not already displayed.
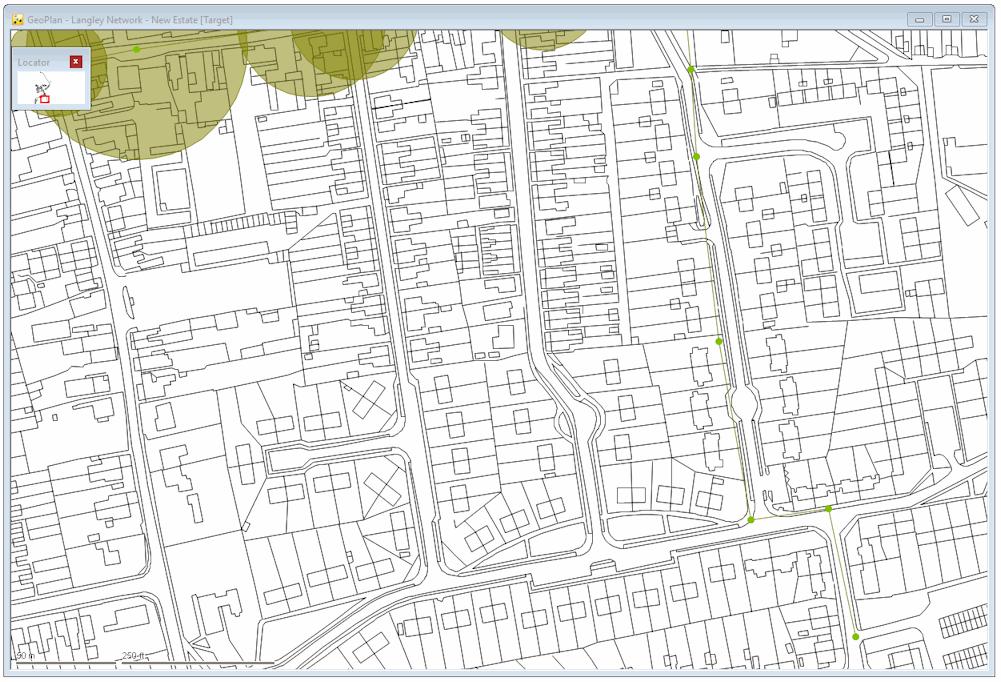
- Check the length of the required run:
- Zoom in on the road where the pipes are to be added.
- Use the
 (Measure distance) tool to estimate the total length of the new run.
 - Add nodes at each of the three road junctions:
- Select the option from the drop-down list on the GeoPlan Tools Toolbar.
- Click the (New object) button on the toolbar.
- Click in the centre of the first road junction, and the Create New Node dialog is displayed.
- Enter '44629002' as the ID and click OK. The Node property sheet is displayed in the object properties window.
- Repeat steps 4c and 4d for the other two junction, using '44629003' and '44619904' as the node ids.
- Connect up the nodes:
- Select the option from the drop-down list on the GeoPlan Tools Toolbar.
- Click the button on the toolbar. The cursor changes to on the GeoPlan.
- Click the starting point for the link (i.e. the node at the start of the run, in this case, node '44628202')
- Click the road halfway between the nodes to create a bend in the link.
- Click the node at the end of the link (node '44629003'), and a Create New Link window is displayed.
- Click OK and the conduit property sheet is displayed in an object properties window.
- Repeat steps 5c to 5f to add the two other links, including "link bends" where necessary, to complete the links between nodes '44629003' and '4469002'.
- Commit the changes to the network, without validation.
- Close the GeoPlan view by clicking the
 button in the top right-hand corner of the window.
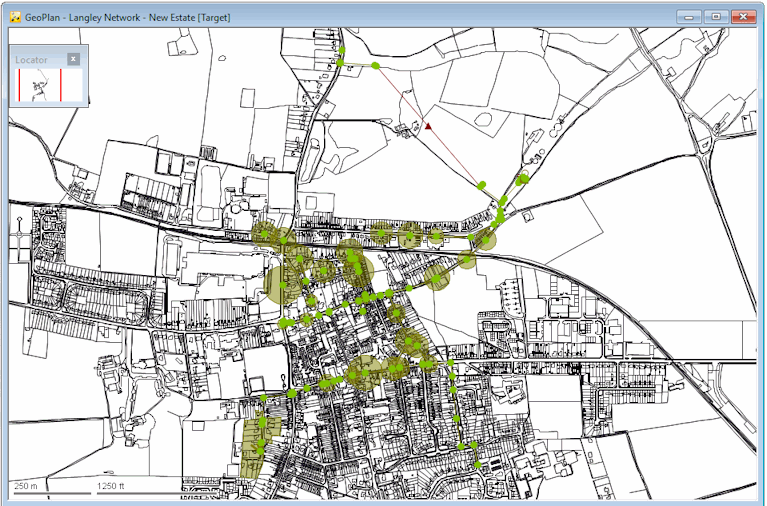
There are pipes running behind the houses on the east of the estate. However, a pipe is also needed along the road that runs down eastward of the estate, with manholes at each of the two road junctions (node id '44628202').
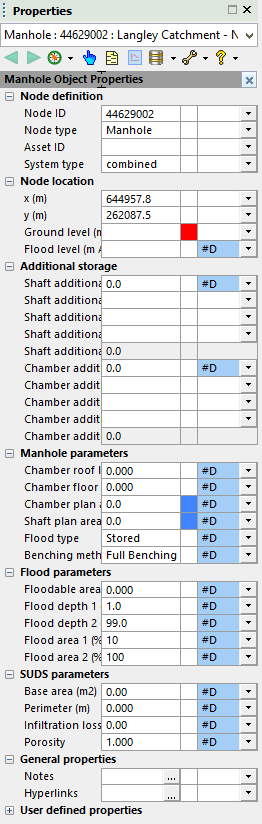
Note that required data (highlighted by red flags in the property sheet) such as Ground level can be added later.
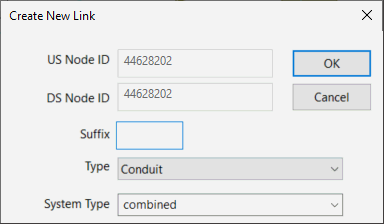
If you do not specify a Suffix, InfoWorks ICM will automatically allocate one.
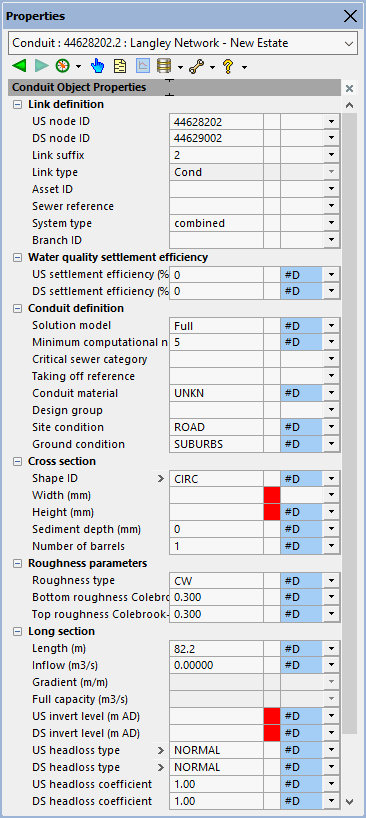
Note that required data (highlighted by red flags in the property sheet) such as Width can be added later.
 Back to flowchart
