Distribution Network practical example
This example shows how to generate two forms that are linked. There is a schedulable hydrant test form, with a button linking to another hydrant test form.
Prerequesites
You will need to log in as an Administrator or System Administrator.
The network must be a Distribution network.
Scheduling must be enabled for the current application.
The default Ask about marking the form as "In Development" option must be enabled in the Options dialog.
Hydrant Test Extended Form
- Select New from the Forms group of the Forms tab.
- Ensure that the Default tab is in focus.
Tip: By default, you can make a Default form and an Android version of the Default form. As the Default Form toolbox on the Android tab is only populated with the InfoAsset Manager Collect/Asset/Distribution system toolbox items when they are added to the Default form, it may be more useful to create the Default version first.
- Expand the Distribution tree and scroll down to the Hydrant test extended item.
- Expand the Hydrant test extended item.
- Drag and drop the following controls onto the form layout:
- User Number 1
- User Number 2
- User Text 1
- User Text 2
- Click the cursor outside of the object boxes on the form layout to display design options that apply to the entire form.
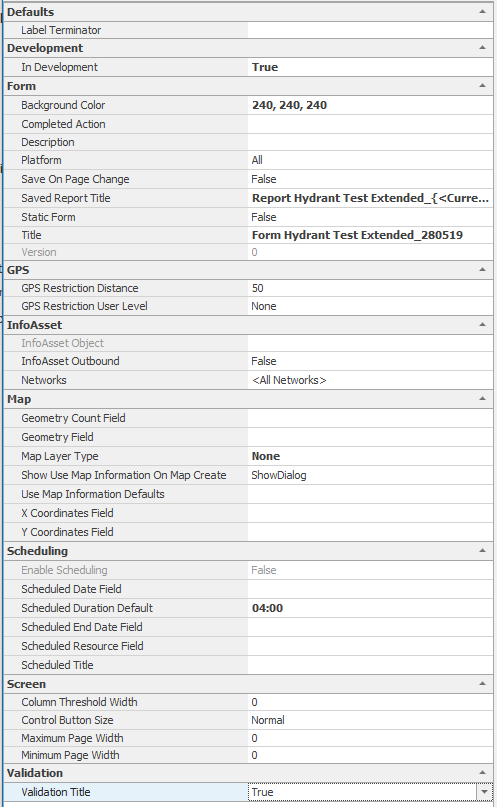
- Set the following options within the Property Box:
- Enter a Title of Form Hydrant Test Extended_DDMMYY
- Enter a Saved Report Title of Report Hydrant Test Extended_.
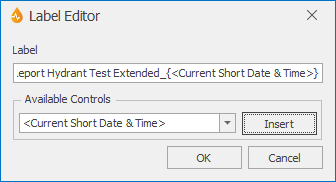
- Click the ellipsis button to bring up the Label Editor.
- Place the cursor at the end of the Report Hydrant Test Extended_ text.
- Select <Current Short Date & Time> from the Available Controls dropdown list, then click the Insert button.
The label becomes Report Hydrant Test Extended_{<Current Short Date & Time>}
- Click OK on the Label Editor.
- Select Save from the Form group of the Form tab.
A message is displayed.
- Click Yes.
Refer to About marking forms as In Development for more information about this flag.
The Property Box will now display the entered information for the form.
- To create an Android version of the Default form:
- Click the Android tab. The blank form for the Android version is displayed in the layout pane.
- Click the Default Form Toolbox tree to expand the items contained in the Default version of the form. This will include the items selected in step 5 as well as any hidden items.
- Repeat step 5 to add the items to the Android form.
- Select Save from the Form group of the Form tab.
-
On the quick access toolbar, select
 (Publish application).
InfoAsset Mobile checks the application for In Development forms. If any are found, a message is displayed offering you the option to clear the flags before publishing.
- Click Yes.
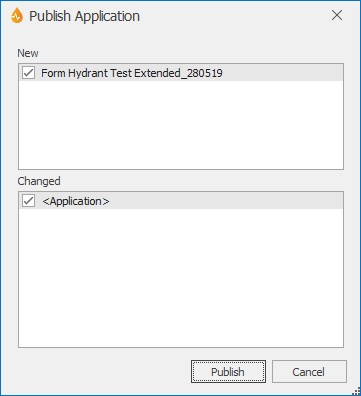
The Publish Application dialog is displayed:
- The newly created form can be found under the New Forms section.
- The checkbox adjacent to it is ticked by default.
- Select Publish and then OK to confirm . Both the Default and Android forms will be published.
Hydrant Test Form - example of schedulable form
We are now going to illustrate how to create a schedulable form.
- Select New from the Forms group of the Forms tab.
- Set the Platform option (located on the Form section of the Property Box) to Windows.
A message is displayed informing you that the Android version of the form will be deleted. As this example is only going to illustrate how to create the Windows version of the Default form, click the OK button. The Android tab is then removed from the Toolbox.
- Expand the Distribution tree and scroll down to the Hydrant test item.
- Expand the Hydrant test item.
- Drag and drop the following controls onto the form layout:
- ID (required, in red)
- Date completed
- Date / Time planned
- Hydrant ID
- Inspection type
- Location photo
- Team leader
- X coordinate
- Y coordinate
- Unique identifier
- Mobile identifier
- Scroll up and right-click to expand the Toolbox tree item.
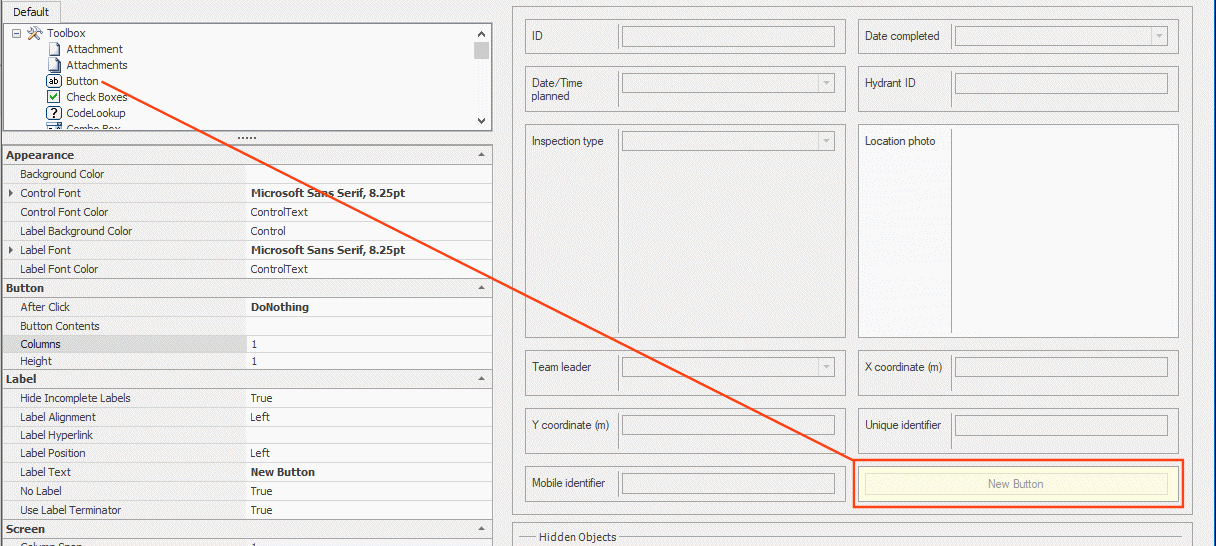
- Double-click the
 Button control in the list.
A New Button object appears on the form.
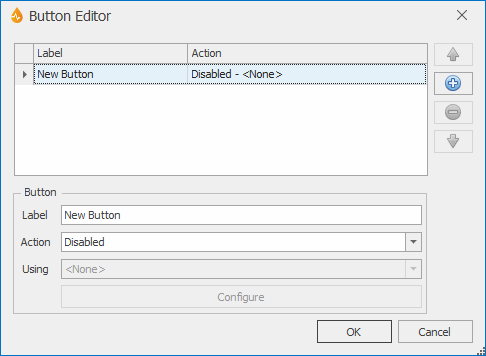
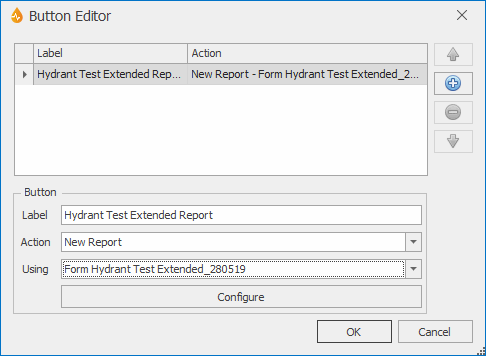
- Double-click the button to reveal the Button Editor and highlight the New Button label in the list.
- Enter a Label of Hydrant Test Extended Report
- From the Action dropdown list, select New Report.
- From the Using dropdown list, select the form created in the pre-conditions: Form Hydrant Test Extended_DDMMYY .
- Select OK to save these changes.
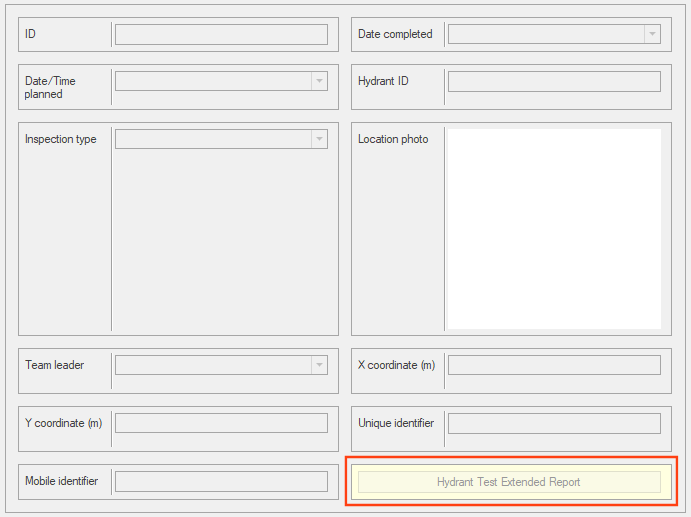
The Button now has our custom label.
- Click the cursor outside of the object boxes on the form layout to display design options that apply to the entire form.
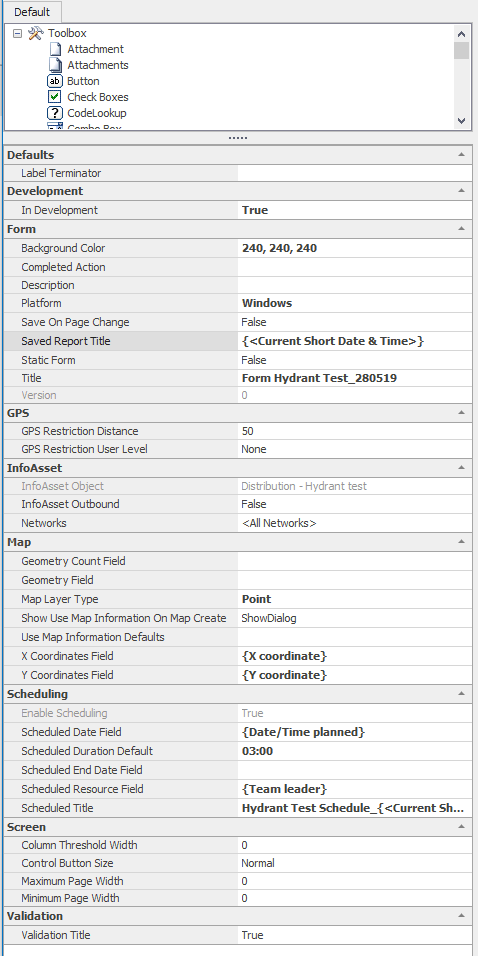
- In order to create a scheduled event, the following design options must be set:
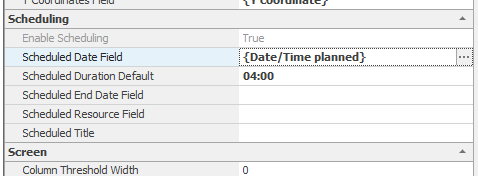
- Scheduled Date Field
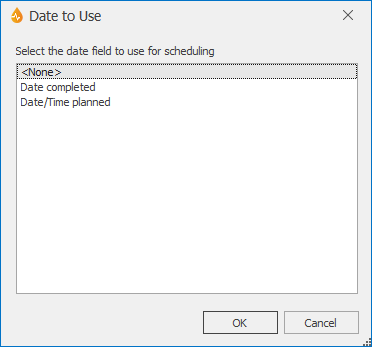
- Select the adjacent ellipsis button to reveal the Date to Use dialog.
- Select Date /Time Planned and click OK. The Date to Use dialog closes.
This automatically changes Enable Scheduling to True.
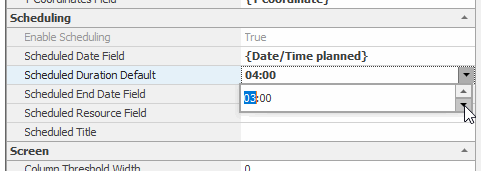
- Scheduled Duration Default
Select the adjacent dropdown arrow adjacent to reveal the numeric field and enter 3hrs (03:00), for example.
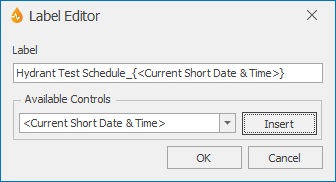
- Schedule Title
Select the adjacent ellipsis button to reveal the Label Editor.
Either type the beginning of a title in the Label box and select a value from the Available Controls dropdown box or compose a title. For the purpose of this example type in the title Hydrant Test Schedule_ in the Label field. Place the cursor at the end of this text, select <Current Short Date & Time> in the Available Controls, then click the Insert button to add it to the typed text. Click OK.
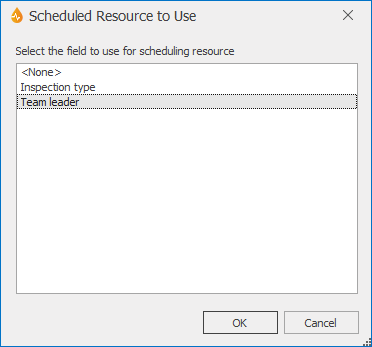
- Scheduled Resource Field
Select the adjacent ellipsis button to reveal the Resource to Use dialog.
Choose Team leader and select OK.
- Enter a Title of Form Hydrant Test_DDMMYY
- Enter a Saved Report Title of Report Hydrant Test_and then use the ellipsis button to add dynamic data to the title, such as <Current Short Date & Time>. Refer to here for details on how to achieve this..
- Select Save from the Form group of the Form tab.
A prompt message related to the In Development flag may be displayed.
- Click Yes.
The Property Box will now show information for the form.
-
On the quick access toolbar, select
 (Publish application).
A message relating to the In Development flag may be displayed.
- Select the option clearing the flag for the form. See About marking forms as In Development for more information.
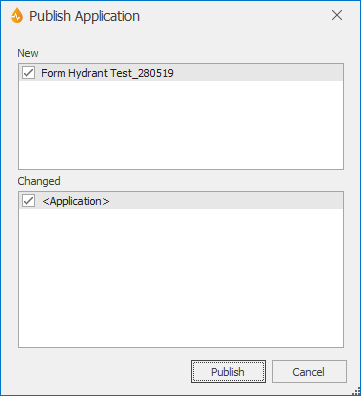
The Publish Application dialog is displayed:
- The newly created form can be found in the New Forms section.
- The checkbox adjacent to it is ticked by default.
- Select Publish and then OK to confirm
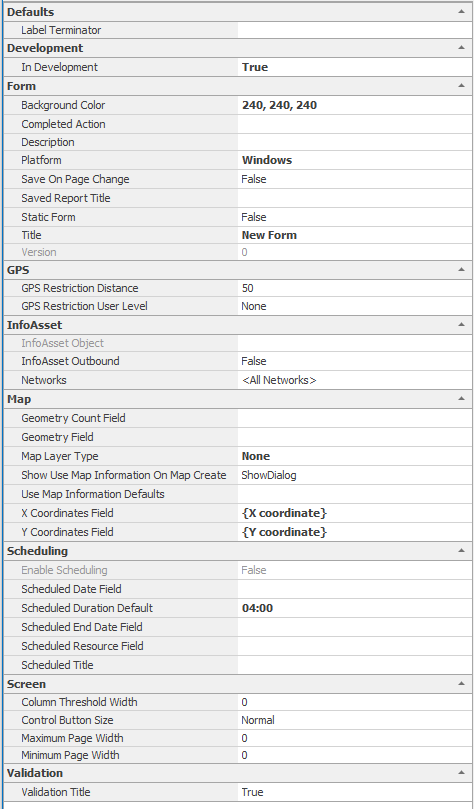
![]() Show the options in the Property Box
Show the options in the Property Box
Generating reports from the forms
We are now going to mimic what users in the field would do (that is, create new reports from the forms that have been set up in the office). Typically, in the field, users would refresh the application so that any new or edited forms related to the application would get downloaded onto the systems.
- Choose the newly created schedulable form on the Forms tab and select New from the Reports group.
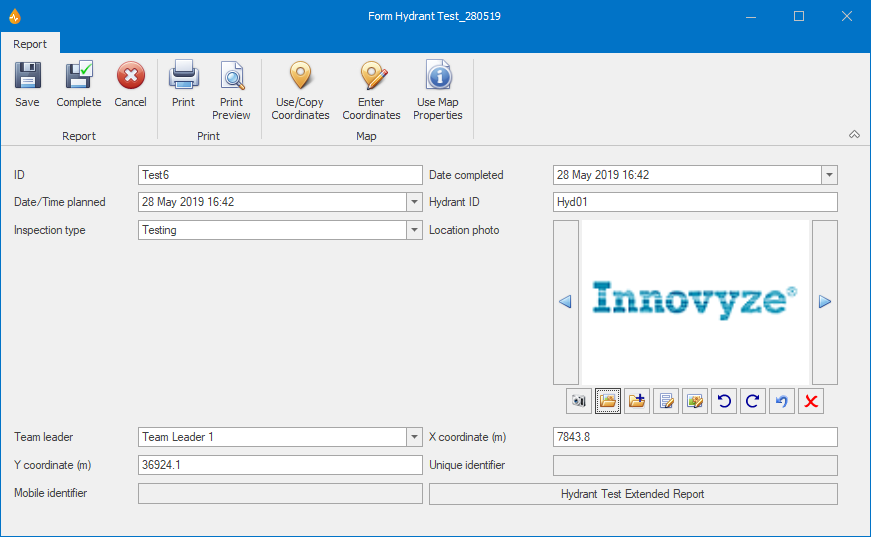
- Complete all of the fields; enter tomorrow’s date in the Date / Time Planned field.
- Select the Hydrant Test Extended Report button
- Enter data into each of the fields.
- Click Complete.
The user is taken back to the first report (Report Hydrant Test_DDMMYY).
-
Click Complete.
The report closes.
- Select the Schedule tab.
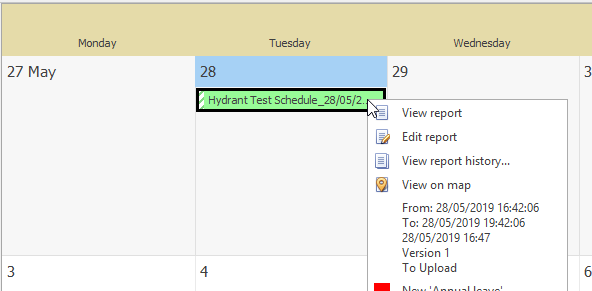
The Hydrant Test Schedule report appears on the calendar for the selected resource (Team Leader 1) on tomorrow’s date, in green as the report has been completed.
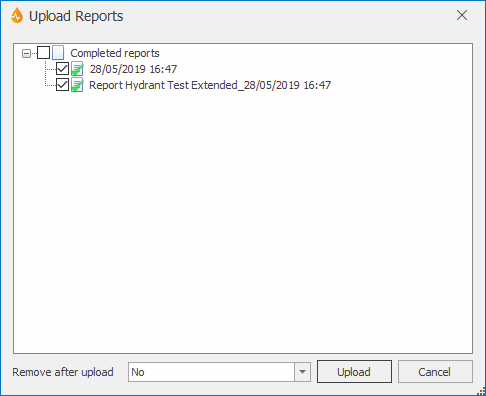
- Select Upload from the Reports group of the Synchronize tab.
- Ensure the checkboxes are ticked against the reports that are to be uploaded and click Upload.
- Click OK on the confirmation message telling you that the upload has been successful.
Checking that the changes have been uploaded to InfoAsset Manager
In InfoAsset Manager:
- Select the appropriate Distribution network.
- Right-click the network in the tree view and choose Update (get changes made by others).
- Select Windows | Grid windows | New survey window.
- Select the Hydrant Test tab.
The Hydrant Test object created via InfoAsset Mobile should appear.
- Right-click the hydrant test in the grid and select Properties to view its properties.
- Check that the data entered in the InfoAsset Mobile report are displayed where appropriate. For example, for the Report Hydrant Test Extended _DDMMYY report, look in the User text, User num tabs or General properties section , and the Notes tab or User defined properties section.
Notes:
- The location of the property values in InfoAsset Manager depends on the option - selectable in InfoAsset Manager - for displaying Property Sheets (old-style property sheet or Object Properties Window).
- You will notice that the Mobile identifier field is populated for the Hydrant Test object, indicating that this object has been imported into InfoAsset Manager from InfoAsset Mobile.

